How to Save as PDF in InDesign: A Step-by-Step Guide
Adobe InDesign is a powerful tool for creating visually compelling print and digital publications. When it comes to sharing or distributing your InDesign work, one of the most popular and versatile formats is the Portable Document Format (PDF).
Saving your InDesign file as a PDF is a relatively simple process that enables you to maintain the integrity of your design elements while ensuring compatibility across various devices and platforms.
In this article, we’ll walk you through the step-by-step process of saving an InDesign file as a PDF.
20,000+ InDesign Templates & More With Unlimited Downloads
Discover thousands of Adobe InDesign templates for your next project with an Envato membership. It starts at $16 per month, and gives you unlimited access to a growing library of over 19+ million graphic templates, design assets, themes, photos, and more.
Exporting an InDesign File as a PDF
Step 1: Open your InDesign file
Launch Adobe InDesign and open the file you want to save as a PDF. Make any final edits to your document before proceeding to ensure that it’s ready for export.
Step 2: Access the Export menu
Click on “File” in the top menu bar, and select “Export” from the dropdown menu. Alternatively, you can use the keyboard shortcut “Ctrl + E” (Windows) or “Cmd + E” (Mac).
Step 3: Choose a destination and filename
In the “Export” dialog box, navigate to the folder where you want to save the PDF file. Enter a filename for your PDF, and ensure that “Adobe PDF (Print)” is selected in the “Save as type” (Windows) or “Format” (Mac) dropdown menu.
Step 4: Configure PDF export settings
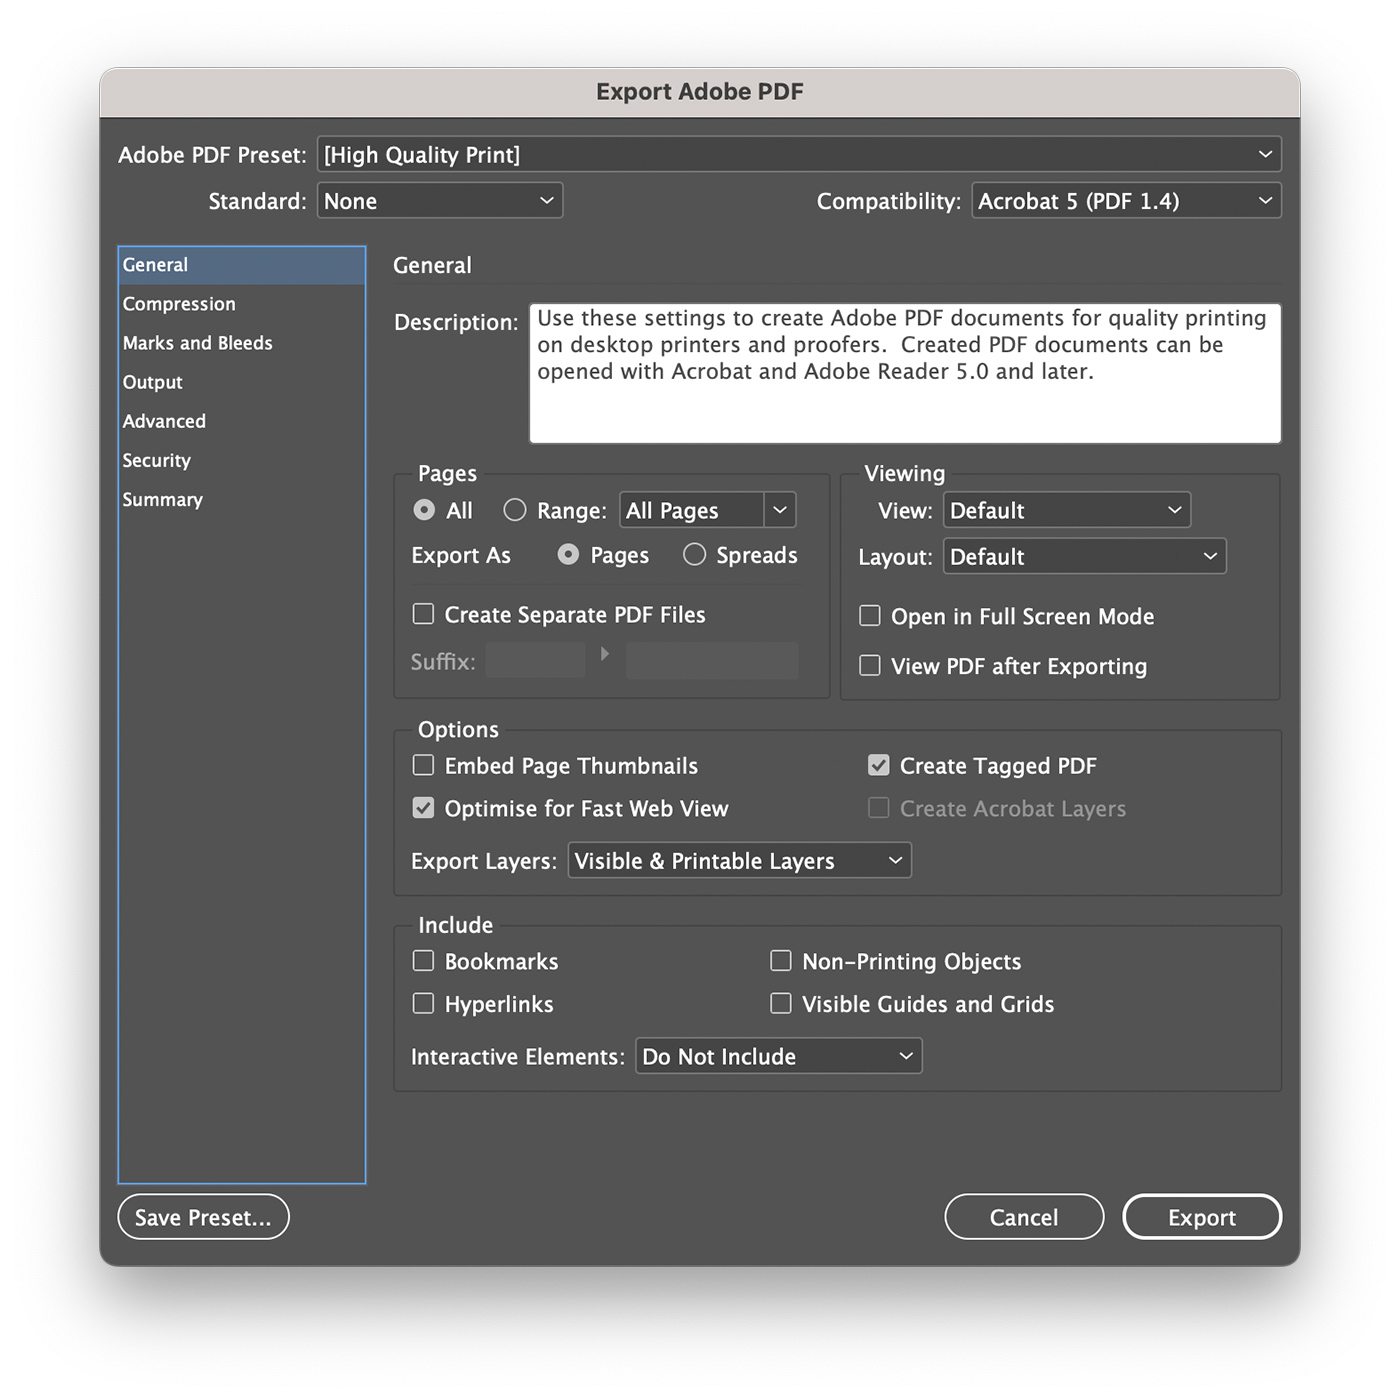
Click on the “Save” button to open the “Export Adobe PDF” dialog box. Here, you can configure various settings for your PDF, such as:
Adobe PDF Preset
Choose a preset from the dropdown menu, which determines the PDF settings based on the intended output. Common presets include “High Quality Print” (for high-resolution printing), “Smallest File Size” (for digital distribution), and “Press Quality” (for commercial printing).

Compression
In the “Compression” tab, you can adjust the image compression settings to balance file size and image quality. Lower compression levels will result in smaller file sizes but may reduce image quality.
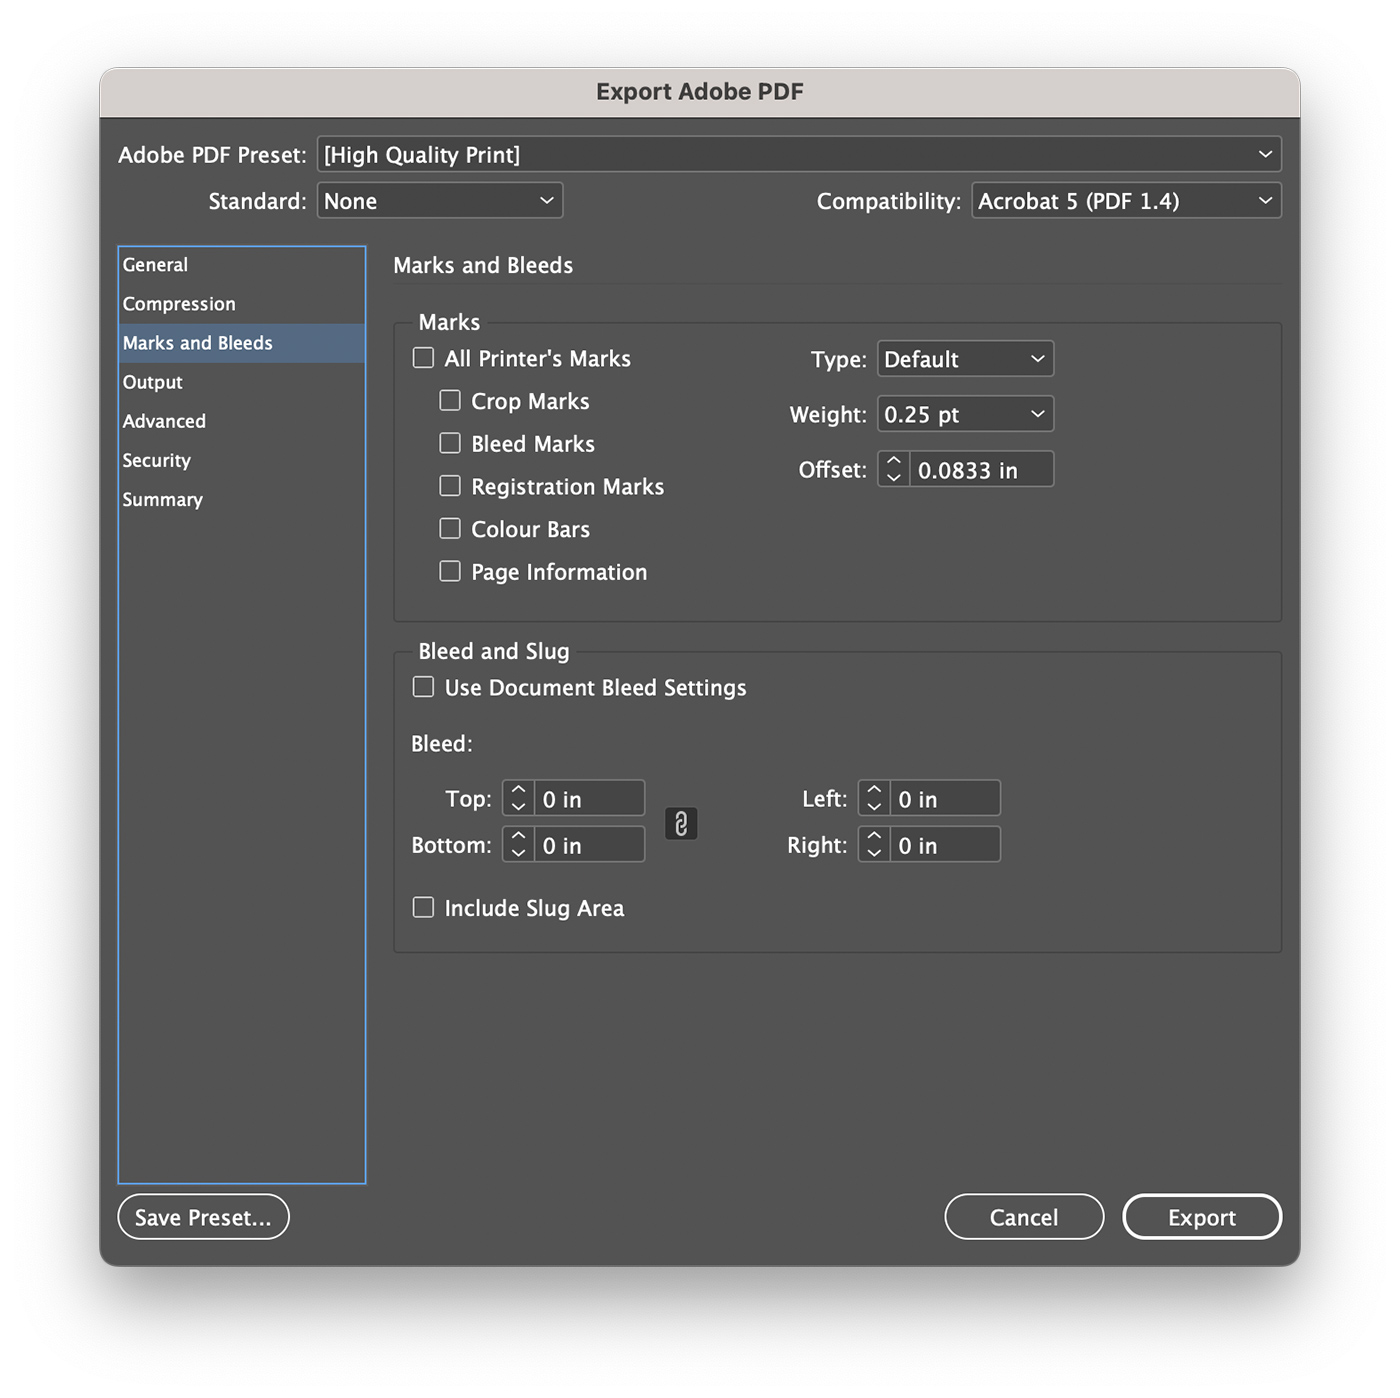
Marks and Bleeds
If your document requires print marks or bleed settings, navigate to the “Marks and Bleeds” tab to configure these options. For most purposes, you can leave these settings at their default values.

Output
In the “Output” tab, you can manage color conversion and color profile settings. For standard printing, it’s recommended to choose “Convert to Destination” and set the “Destination” to a CMYK color profile.
Security
If you want to add password protection or restrict certain features (such as printing or editing) in your PDF, go to the “Security” tab and configure the desired settings.

Step 5: Export your PDF
Once you’ve configured your PDF settings, click on the “Export” button in the “Export Adobe PDF” dialog box. InDesign will save your document as a PDF file in the specified location.
Additional Tips for Saving InDesign Files as PDFs
Proofread and Review Your Document
Before exporting your InDesign file as a PDF, take the time to proofread and review your document thoroughly. Double-check for spelling and grammar errors, alignment issues, and color consistency. This step will help you avoid potential issues that may arise during the printing or sharing process.
Test on Different Devices and Platforms
After saving your InDesign file as a PDF, open it on various devices and platforms to ensure that your design appears as intended. This step is particularly important if you plan to distribute your PDF digitally or share it with a diverse audience.
Consider Accessibility
When creating a PDF from your InDesign file, consider how accessible it is for individuals with disabilities. For example, you may want to include alternative text for images, use clear and legible fonts, and structure your content in a logical order. Making your PDFs more accessible can help you reach a wider audience and ensure that your content is available to all users.
Embed Fonts
To avoid font-related issues when sharing or printing your PDF, ensure that all fonts used in your InDesign document are embedded in the PDF file. This step will help maintain the consistency of your typography and avoid font substitutions that may negatively impact your design.
Conclusion
Saving an InDesign file as a PDF is a straightforward process that allows you to share your work easily and maintain the integrity of your design. By following the steps outlined in this guide, you can successfully export your InDesign documents as PDFs and ensure they look great on various devices and platforms.
This skill will not only benefit your personal projects but also enhance your professional capabilities, allowing you to deliver high-quality work to clients, colleagues, and collaborators.