5 Procreate Tips for Pro iPad Design
Procreate is the main reason artists fell in love with the iPad Pro. It’s the app that transformed the iPad into the portable drawing pad that every artist dreamed of.
Procreate is an app full of amazing features and possibilities. Today we share with you some of the best Procreate tips to help you make the most of this app.
Whether you’re just getting started with iPad Pro and Procreate or an expert looking for useful tips, this guide will surely help you create professional art using the popular iOS app.
1,000's of Procreate Add-Ons, Brushes & More With Unlimited Downloads
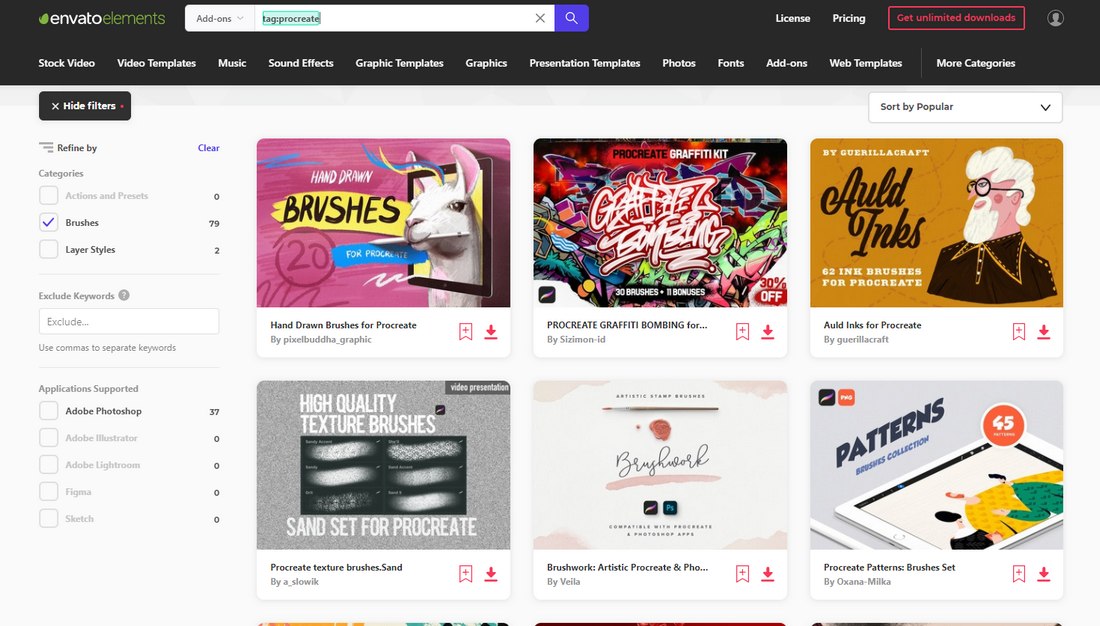
Download thousands of Procreate add-ons, brushes, scripts and more with an Envato membership. It starts at $16 per month, and gives you unlimited access to a growing library of over 19+ million graphic templates, design assets, themes, photos, and more.
What Is Procreate?
Procreate is a digital painting app exclusively available on iOS. Since its release in 2011, the app quickly became the go-to app for digital illustrations. Especially because it paired well with the iPad Pro and Apple Pencil.
Procreate is an app used by everyone from beginner artists to professional designers in various ways. In addition to painting and creating digital art, the app is also useful in hand-lettering design, tattoo art design, typography design, and much more.
Even though it may seem like a simple iOS app, Procreate is full of surprises. In this post, we wanted to highlight some of the useful and lesser-known features of the app. Have a look and see if you already know any of these Procreate tricks.
1. Know Your Way Around the Canvas
The canvas is your main playground in Procreate. So it’s important to know your way around this main canvas area to improve your workflow, save time, and draw like a pro.
The canvas in Procreate works and feels buttery smooth. It’s one of the reasons why artists love using this app. These pro tips will help you get even more out of the Procreate canvas.
Draw Without Going Outside The Lines
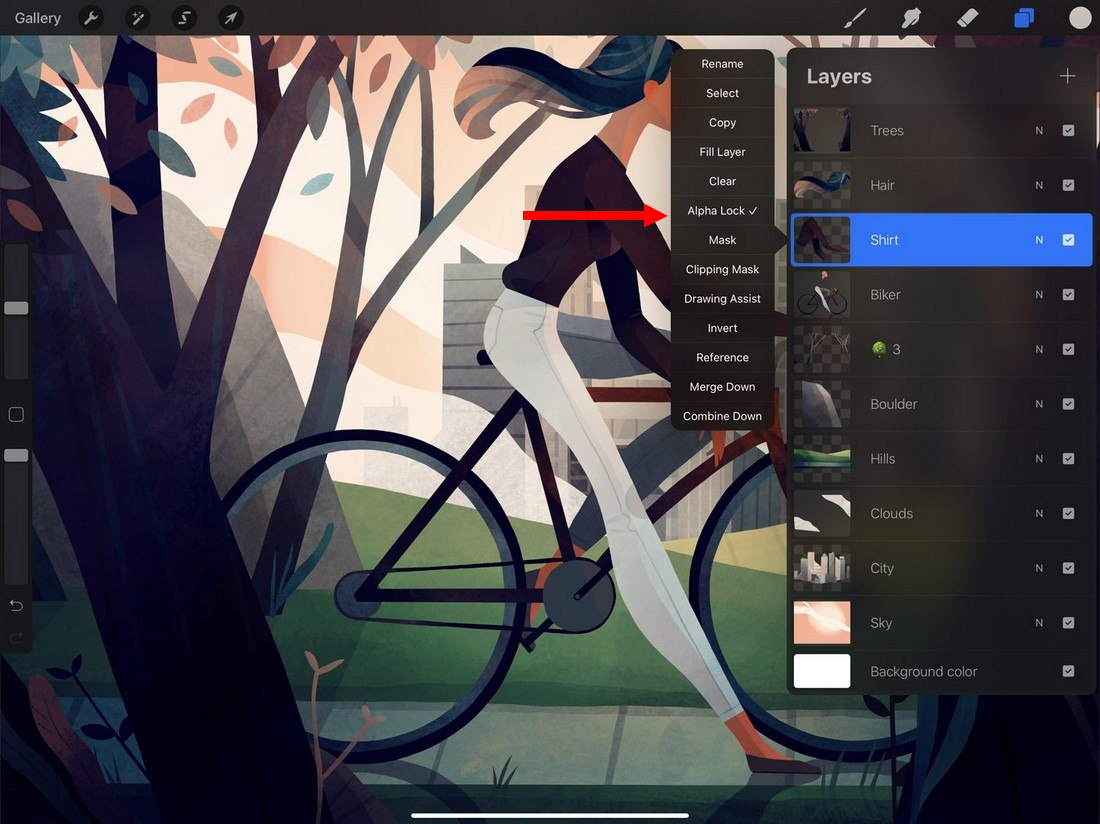
One of the most popular features of Procreate is its Alpha Lock function. It allows you to draw and color your illustrations without going outside the lines.
This feature is so useful that many artists get the app just for this function alone. Just in case you’re not aware of this, here’s how Alpha Lock works.
Open the layers panel and tap on the layer you want to color. Then select Alpha Lock from the menu. Now start coloring and see the magic happen.
How To Flip Canvas in Procreate
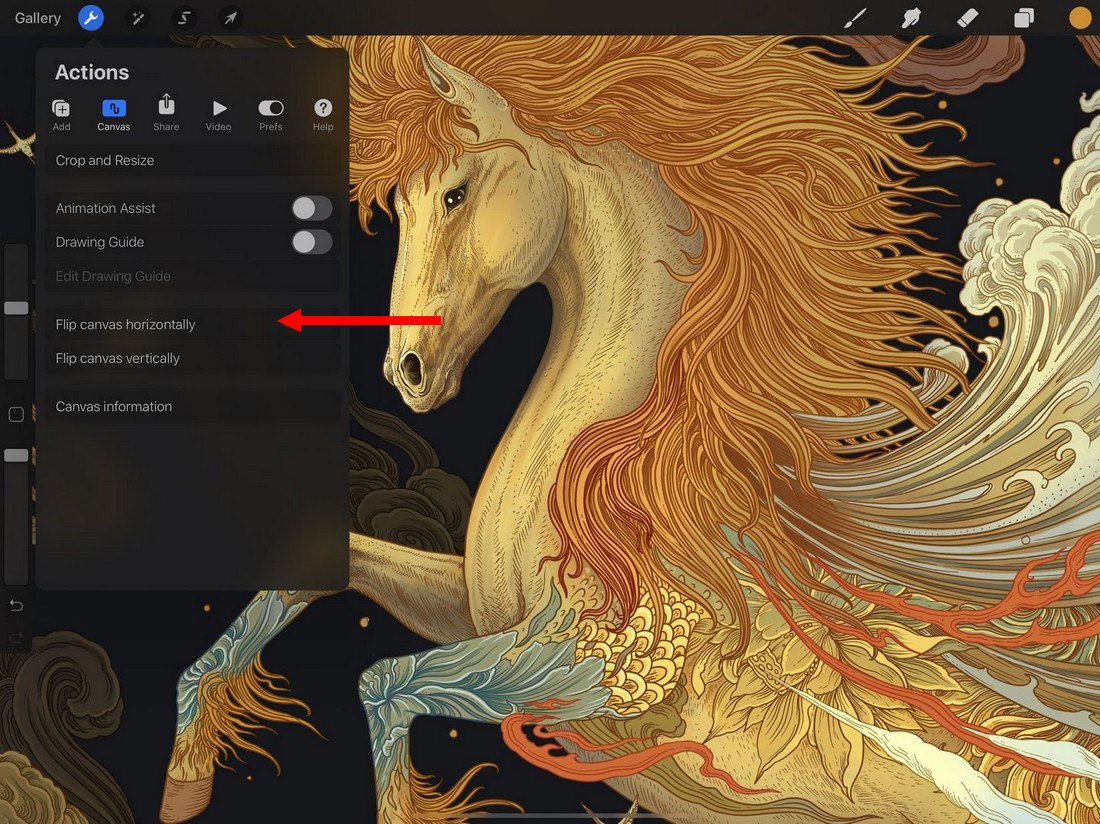
Being able to flip canvas in Procreate allows you to see your artworks in a whole new angle almost instantly. It’s not only a great way to spot your mistakes but also helps you to get a better view of the smaller details.
To flip canvas in Procreate, all you have to do is go to the Actions panel on the left-hand side and select whether to flip the canvas horizontally or vertically.
How To Undo in Procreate
There’s also a very easy and faster way to undo your actions and mistakes in Procreate without having to pull out any menus.
Simply tap the screen with two fingers and it will undo your actions, one at a time.
How To Easily Fill Colors in Procreate
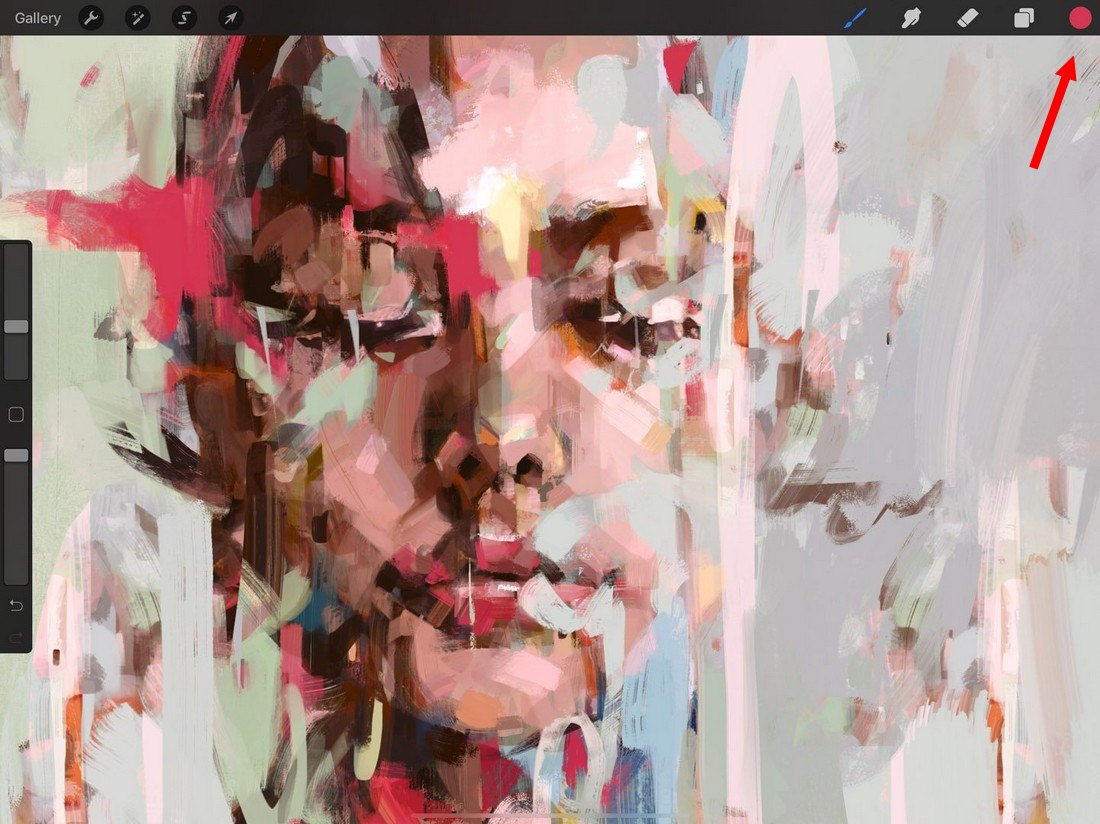
Coloring using a brush can be tough when you have to cover a large area. Thankfully, there’s an easy way to fill colors in Procreate called ColorDrop.
First, select a color and then close the colors panel. Then tap and hold on the color button on the top-right corner. Then drag and drop the color onto the area you want to flood-fill.
2. Use Custom Brushes
Procreate comes loaded with a set of great brushes. But they are not the best choices for professional work. The good news is that you can easily download and install third-party brushes in Procreate.
This is especially useful when it comes to hand lettering designs. As well as for shading and texturing work.
Envato Elements is one of the best sources for downloading Procreate brushes. Mainly because all the brushes in the marketplace are handcrafted by professional artists. Also, when you subscribe to Envato Elements, you get to download everything in the marketplace for a single price.
How To Install Custom Brushes in Procreate
If you haven’t installed a custom brush in Procreate before, here’s how it works.
- UnZip the downloaded brush and locate the .brushset file
- Tap on the .brushset file and it will automatically import all the brushes in Procreate
If you’ve downloaded a single brush, tap on the .brush file and choose to open it in Procreate to import the brush into the app.
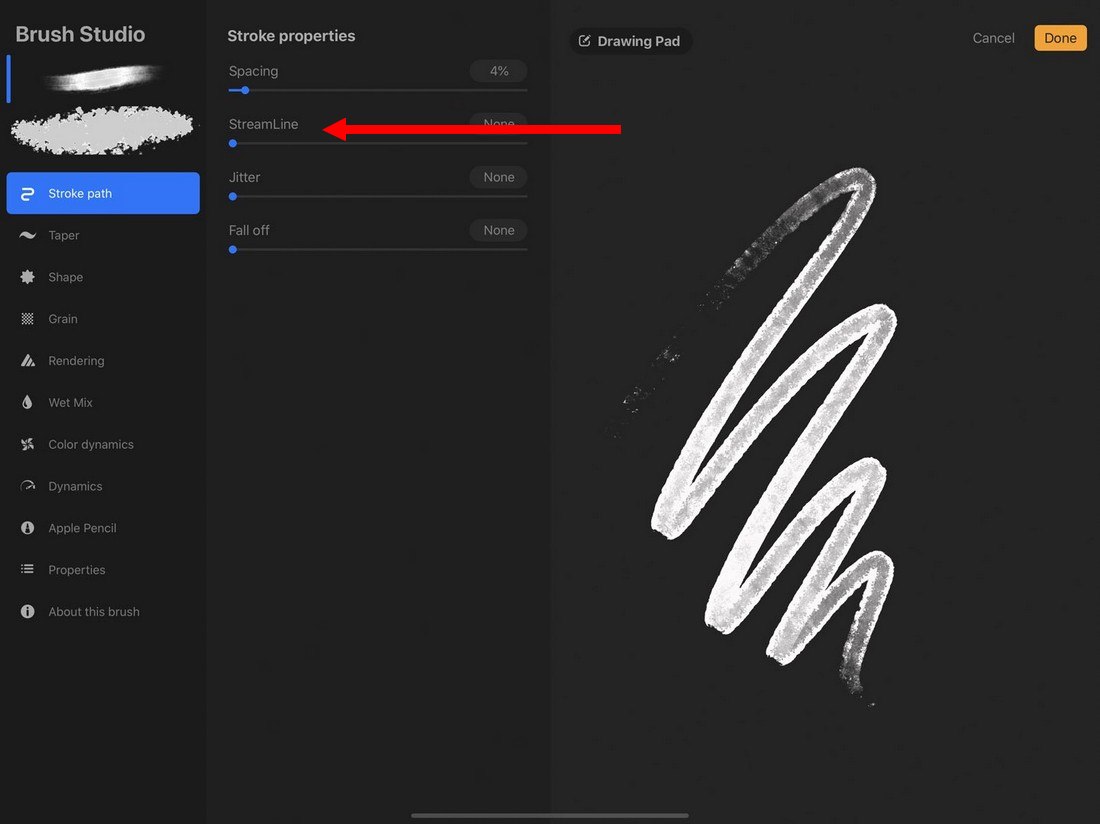
How To Turn On Streamline
The streamline function is another amazing feature available in Procreate. But many artists aren’t aware of it.
When enabled, Streamline allows you to draw much smoother lines using brushes. It’s very useful in hand-lettering designs. Try it out.
Simply open the brush panel or brush library and adjust the Streamline setting to your preference. This setting smoothens the rough and wobbly edges of the brush strokes to give them a solid and smooth look.
3. Learn To Sample & Create Color Palettes
Learning to work with colors and color palettes is a skill every artist needs to master. Procreate has a few great features that make this process a whole lot easier.
How To Sample Colors in Procreate
Imagine doing custom artwork for a brand where you have to use the exact same colors used by the brand. How do you find those exact colors in Procreate? Well, it’s much simpler than you think.
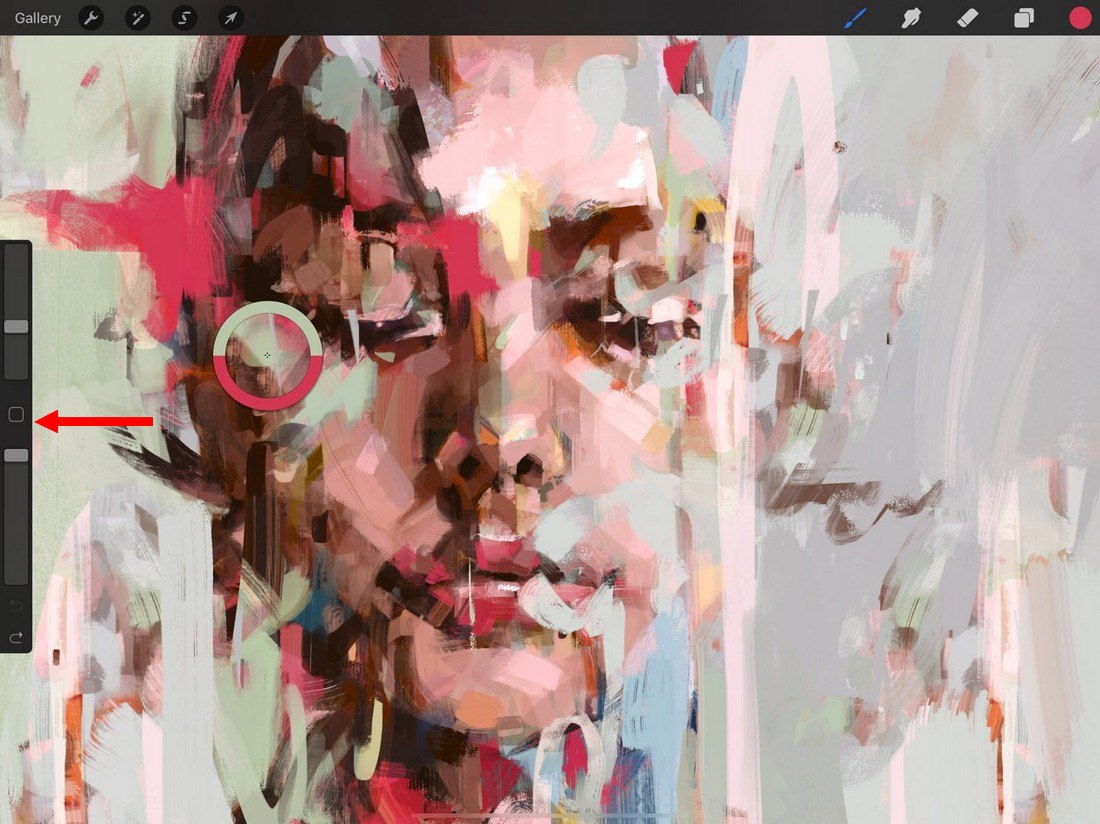
Procreate has a very useful color sampling tool that allows you to sample colors directly from an image.
To do this, simply open an image in Procreate and tap on the square outline icon on the sidebar panel on the left. This will bring out the color picker tool. Just drag it around until it picks up the color you want and let go to select the color.
How To Create Color Palettes in Procreate
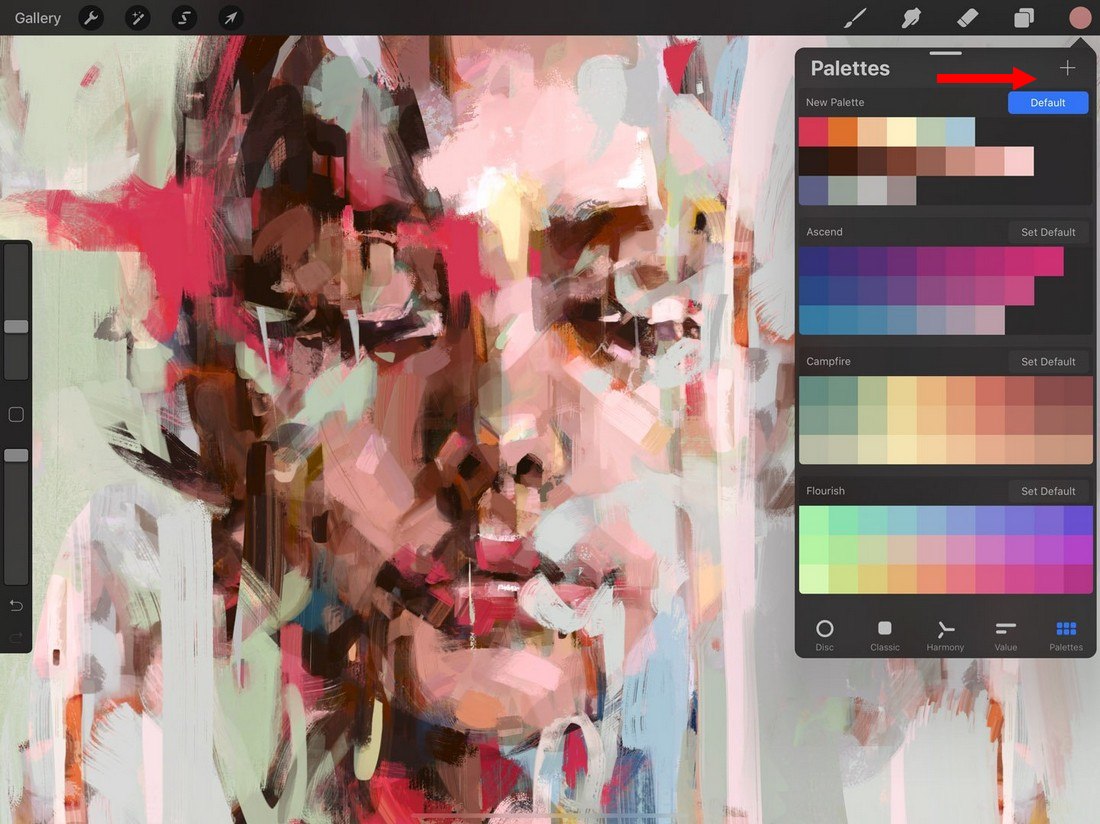
After picking a custom color, you can go ahead and create custom color palettes that you can use throughout your design projects.
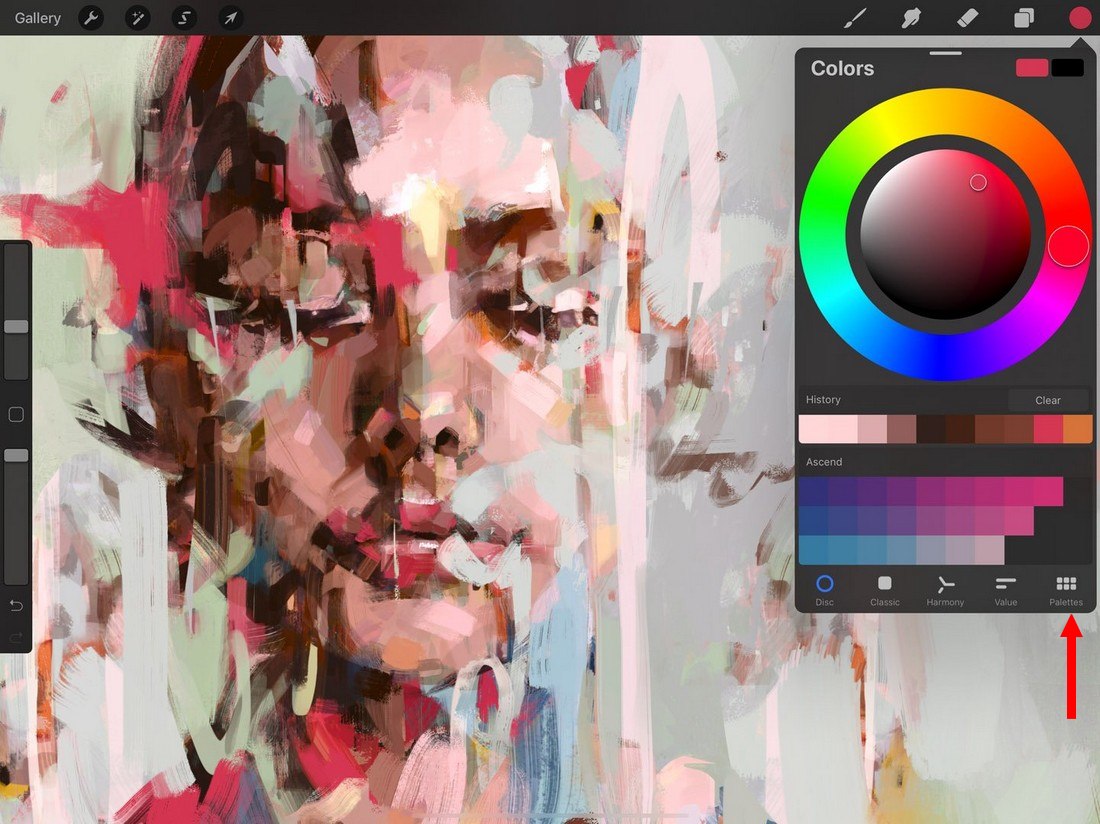
To create a new color palette, simply open the colors tab and click on the Palettes icon on the bottom.
Then tap on the + plus icon to create a new blank color palette. Now you can add the custom colors that you pick using the color picker tool by selecting the color and tapping in an empty box in the color palette.
4. Master The Layers
Learning the ins and outs of layers in Procreate is important when you’re working on professional artworks and designs. Follow these useful tips to get more out of Procreate layers.
Useful Layer Modes in Procreate
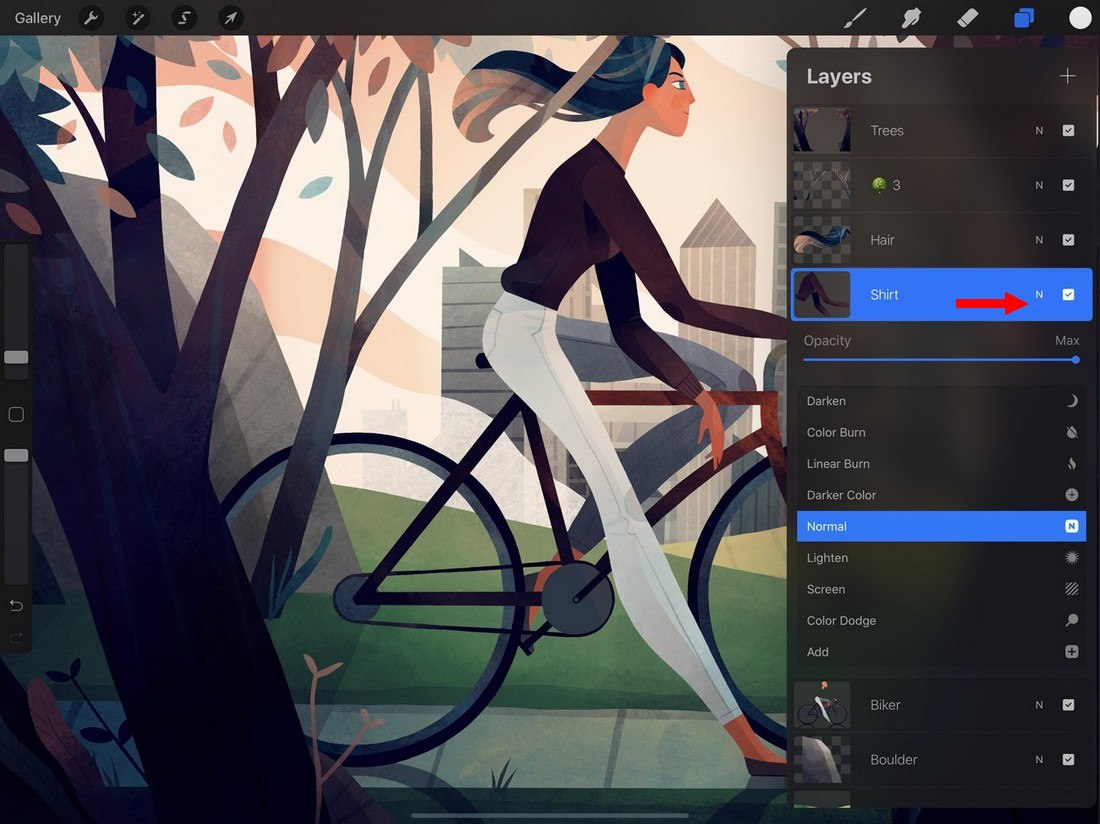
Layer Blend Modes is kind of a familiar feature for designers, especially for those of you who use Photoshop. Procreate also has layer blend modes that help you create overlay layers more easily.
You can access the blend modes by opening the Layers panel and tap on the letter shown in each layer to access the list of blend modes.
How To Group Layers in Procreate
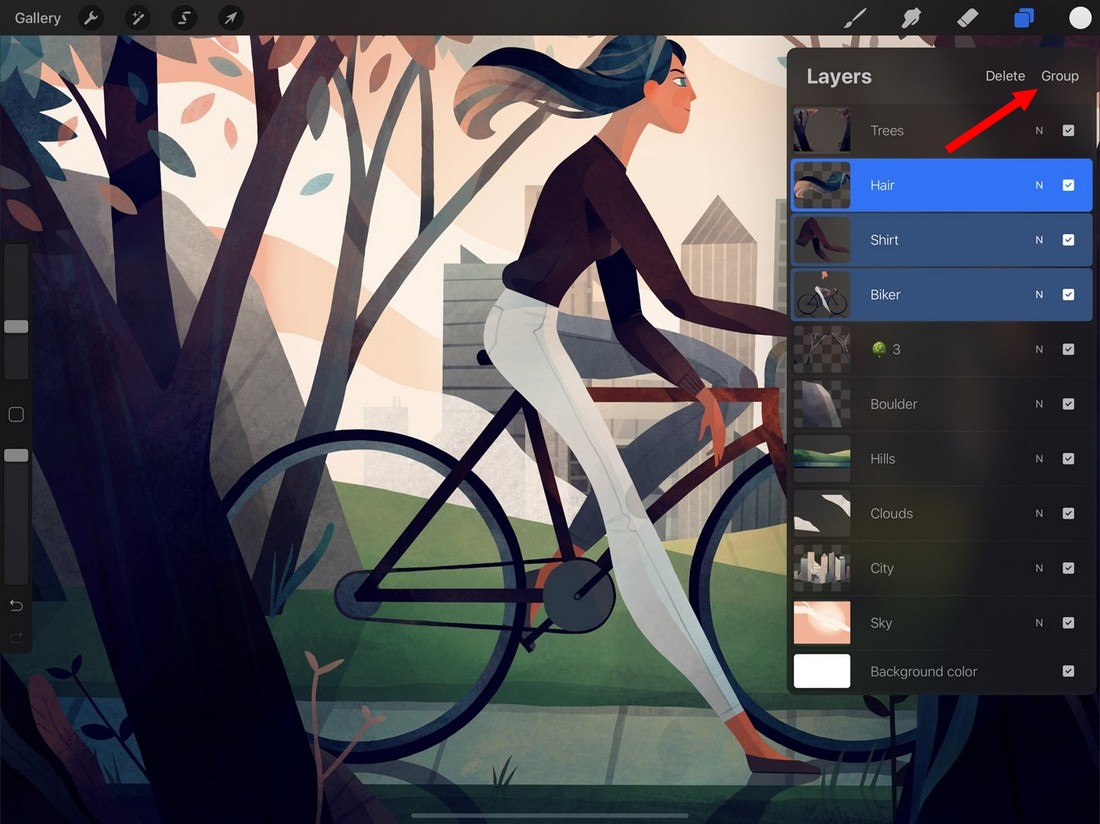
Grouping layers in Procreate allows you to organize your canvas. For example, if you want to move multiple objects at a time, you can group them together to manage them more easily.
To create a group, select the layers (swipe right on secondary layers to add them to a selection) and then tap on the Group link on the top of the Layers panel.
5. Record Your Process
Procreate has another cool feature that allows you to record your process and workflow called Timelapse. It basically records your drawing process and saves them as video files.
This is quite useful when you’re creating videos for YouTube or even for sending to clients to show your process.
How To Record High-Quality Video in Procreate
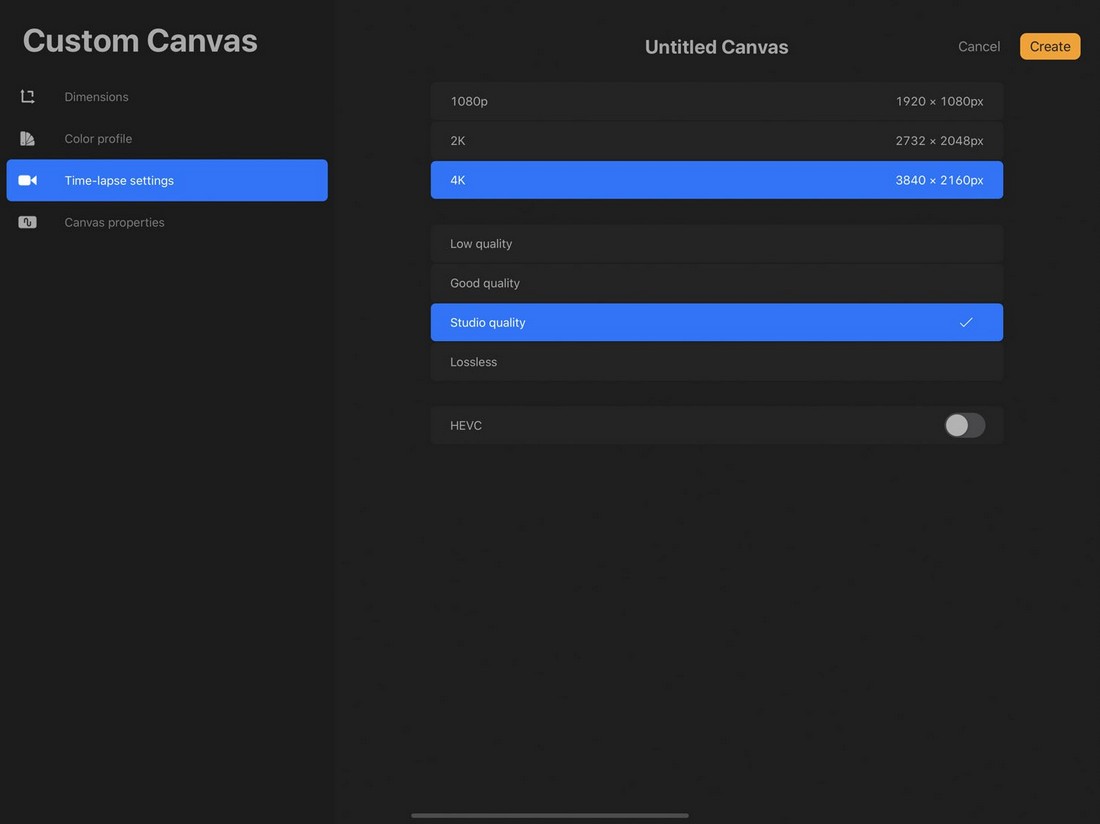
You can record and save Timelapse videos in high-resolution from 1080p to all the way up to full 4K.
You can choose the quality of your timelapse videos when creating a new canvas. It’s done from the Custom Canvas screen.
In Conclusion
Procreate is one of the easiest graphic editing apps to learn. With these tips, hopefully, you’ll be able to supercharge your workflow on the way to becoming a pro designer.
If you’re interested, you can check out our Procreate tutorials guide to learn more great ways to use the app. Also, be sure to explore our best Procreate brushes collection.
